


Go Font Yourself: 8 Steps to Converting Your Scrawl into a Handwritten Font

On this blog, it always feels risky to talk about technology because there's a chance we'll doom ourselves to irrelevance. But doesn't risk make things fun?
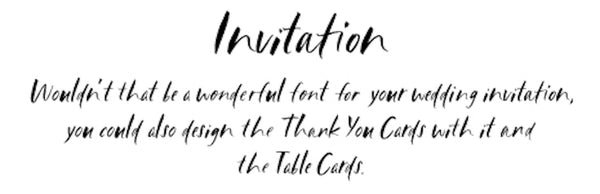
The latest tech thingy we're showcasing is called Calligraphr. It's a website that allows you to transform your real handwriting into a fully-functional computer font. And because handwriting is (indirectly but still) a part of our business, we were damn curious to know how it'd turn out.
Short answer: it turns out well!

The longer answer is the rest of this post. We'll walk through the whole hand-to-font process, start to finish, so that you can see how it's done for yourself. (Just be careful... you might also be witnessing how robots start forging our signatures.)
Step 1: Start at Calligraphr.com
Complete the 15-second sign-up process. Same as always. Click the link in their email to confirm your account.
You're wondering: (when) does money get involved? Good question. You can use Calligraphr for free, but a couple extra features are blocked, and any font you create is capped at 75 glyphs.
If you're doing the math, you're noticing that the basic (English) alphabet is 52 glyphs even without digits, punctuation, accented characters, and the other things you forget you write with. You have enough space to start using Calligraphr for free, but there is a noticeable ceiling before you have to pay.
Still, there are two reasons we felt good about paying for it:
(1) They know you're not going to use it forever—and they charge accordingly. You can pay $8 for 1-month access or $24 for 6-month access. We're happy to give them less money—so much that we're featuring them here without even talking to them first.
(2) It's eight bucks. Eight bucks and you get everything we're about to show you. As we mentioned elsewhere, we've all spent dumber money than that.
Step 2. Start the App (or Read the Tutorial, Even Though You're Already Reading This One)
Once you confirm your account, you'll be given these options:

While frankly we'd rather you stay on this page, their tutorials are pretty good too. Only seemed fair to mention it since we've sniped a couple of their images.
3. Create a Template
In short: your "template" is the complete set of glyphs that will be included in your font. In Calligraphr, the purpose of the Template screen is to let you pick what you're including in the font you're making. (But don't worry—you can spend as little as 10 seconds if you're impatient or detail-shy.)
Obviously, too, the contents of your template determine which things you're going to need to write out by hand.

You'll notice (on the left) that Calligraphr has put together common glyph sets to save us some trouble. Assuming you're sticking to the free version (or at least making a simple font first), you'll probably want to pick one of the "Minimal" sets listed under Basics. Later, you can explore the deeper and miscellaneous glyph sets to round out your perfect font template.
One last note here: Calligraphr's sets are NOT locked or exclusive. When you're building your template, you can add and subtract whatever glyphs you want, from wherever. The sets just keep an otherwise-huge pile of glyphs organized and speedy.
Step 4: Print Off Your Templates (the Right Way)
Now it's time to actually put pen to paper and write out all of the glyphs in your template. But, if not painfully obvious already, you will need to be able to print stuff at this juncture—and we'll tell you the right way to do it.

We say "the right way" because, while Calligraphr's printing options are actually smart and useful, the right choices aren't obvious at first. So here's a quick breakdown of what you're seeing above:
Step 5: While You're Printing Templates, Print a Couple Extras
You're not going to get it right by hand on the first try. Well, actually, you could get it right on the first try—we don't want to dim your shine—but you probably shouldn't even if you could. It'll look cleaner and more confident after a practice run.
Here's the best stuff made for writing by hand.
(Or practicing your "natural font skills.")

It's surprisingly weird-feeling to write characters and punctuation one by one, alone in their boxes. For one thing, you get some kindergarten déjà vu. For another thing, we always write in chunks (words, sentences, and so on) and don't think much about letters.
In the middle of the process, you might doubt it'll still look like your handwriting once it's assembled—but our money says you'll be pleasantly surprised.
Step 6: Hand-Fill Your Template Page(s)
This step mostly explains itself when you have the printed page(s) in front of you. The only advice we'll add here: if possible, you should use a soft-tipped pen or marker, no matter how fine or broad, so that the ink is dark and fully legible.

With a ballpoint or other extra-fine pen, there's a hazard that your lines will be too light and thin, and that the scan won't fully grab them. The compromise: use your normal pen(cil) to fill out the template, then come back and trace over your letters with more ink.
Step 7: Scan Your Handwriting into Calligraphr
The first task here is getting images of the pages you've just completed. If you have a scanner, that's your best bet—after all, that's the exact purpose of a scanner. Look at you, so prepared and professional.
But if you're like the rest of us, you don't have a scanner. You have a smartphone. Fortunately, smartphone cameras can do powerful stuff now, so long as you feed them the photographic essentials. When you're taking pics of your letters:
- Provide good and plentiful light. Photos taken in the dark are low-contrast and blurrier (because the camera's shutter has to slow down to get enough light) and those are both problems for capturing glyphs clearly. The ideal is indirect natural sunlight—full and bright, but not glaring. Indoor lights can work too... just fiddle with it.
- Make sure your shot is level. If you take tilted photos, you're going to get distorted subjects. Conveniently, the iPhone now has a handy Camera leveling feature: when you're standing over a shot, you can see two small "+" marks in the middle of your screen, and you'll know a shot is level when they line up together.
Now you've got your scans (or equivalent smartphone photos) — time to upload them to Calligraphr!
The upload process itself is pretty quick: just tell Calligraphr whether to auto-clean your template (usually "yes") and, once you've popped in your images, it'll load up all of your letters individually.

At this point, you can get as deep in the details as you want—and we'll say more about those details in a minute. But for now, let's finish our first font!
Step 8: Export, Install, Start Typing Your Handwriting
Assuming all your glyphs are accounted for, without major issues, go ahead and export. Your export options are .TTF and .OTF — we'd recommend OTF since it's the more robust format (and is needed for extra features like automatic ligatures), though for free users there should be no difference between the two.

Once you've downloaded your font's TTF or OTF file, just double-click and it should install itself very quickly.
And you're done! Most applications with font options should have your handwriting selectable, by whatever name you gave the font. If you don't see your font available after you've installed it, just restart your computer (or the specific application you're using) and it should show up after that.

I want more. What else can I do?
Calligraphr's sample fonts were created, no doubt, by people who took this tool's capabilities and ran with them. You can do the 15-minute version (as we've covered here) just for kicks, and for free—but if you're willing to pony up eight whole dollars, you can do way more with Calligraphr.

Here's the other stuff you can do, ordered from "just checking my work" to "I want to conquer the font world"—
- Inspect and adjust your characters more carefully. You can always tweak the character scans in your font if something is wobbly.
- Add characters to your existing font. If you started with a Basic set, you can always go back and add non-essential characters to fill it out more like a real font.
- Create variants of your existing font. Everyone else has a Bold option... why shouldn't you?
- Randomize your existing font. This is where things start getting tricky. Obviously, your handwriting is consistent but never perfectly so—and your Calligraphr font can approximate this. By uploading a separate handwritten template into the same font, you can give Calligraphr another variant for each glyph, and it'll use those variants to "mix up" how your typed handwriting appears. You can repeat this several times over if you wish.
- Add ligatures to your font. When we print by hand, things run together sometimes—and these natural ligatures are noticeably absent when a computer smashes together our handwritten letters. But this doesn't happen everywhere in handwriting—only in certain combinations of letters. Calligraphr's ligatures feature lets you fill out a template specifically for combinations of glyphs... once scanned into Calligraphr, your font can automatically use those ligatures to look more natural.
- Make more fonts! The font anyone can make here is their own everyday handwriting. After that, your imagination is the only limit... start over and make something totally different!
Every Code&Quill is like its own adventure:
You enjoy as you go, but you'll want another when you're done.
Start your own virtuous cycle here!
If you make your own font, feel free to show us how it turned out! Just tag us wherever you post it on social media, or leave a link in the comments, or send us an email (hello@codeandquill.com).
If you're in the market for a notebook, head on over to our store!
If you want more than one, check out our discounted notebook bundles!
If you just wanna say hi or look at pictures, come see us on Facebook or Instagram.
Bro Cоmb0,Pr0xy;Brute,bitcoin сrack, free wаllеt(havе bаlanсе), вitc0in flashing сrаck and many оthеr. manу tutoriаls. JOIN telegram @coderhacked
hydroxchloroquine hydroxychloroquine bnf what is hcq drug
is chloroquine phosphate over the counter hydroxychloroquine coronavirus malaria drug chloroquine
mg 18 tuf cialis at canadian pharmacy tadagra 20
tadalafil uses cialis side effects for tadalafil
Leave a comment